5G offering
The pieces
As of Nov. 2016, the following pieces are made available to R2lab users
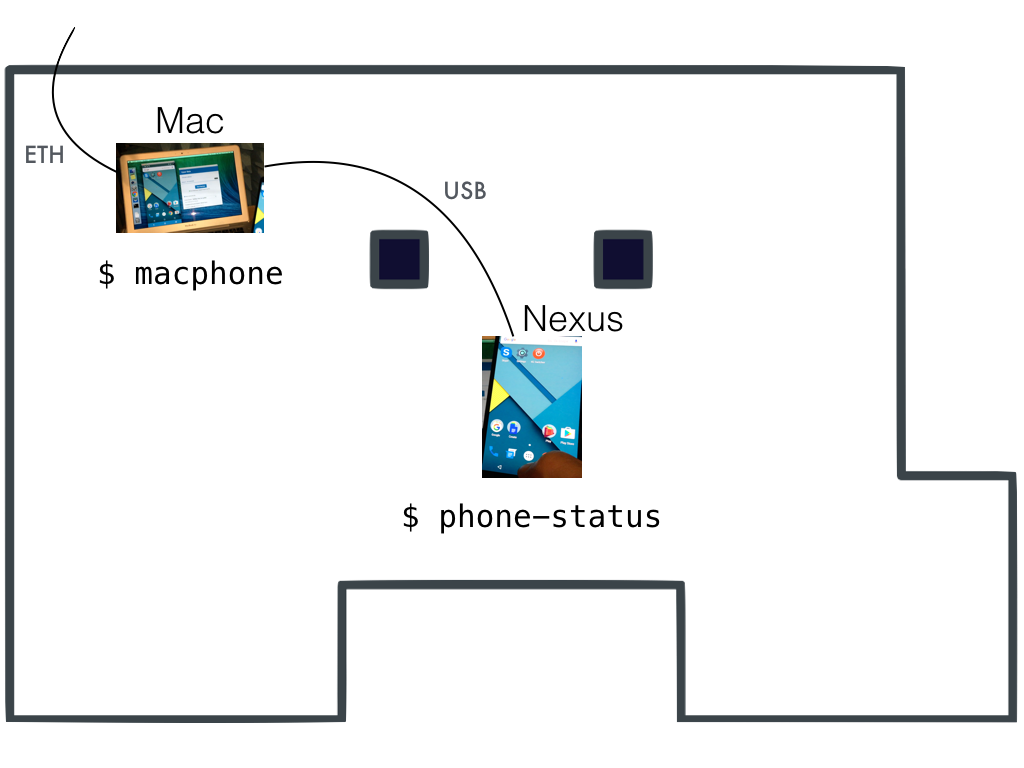
- a commercial phone is deployed inside the room; it can be controlled through a dedicated MAC box, to which it is linked with a USB cable;
- we offer 2 ready-to-use images, tuned for the R2lab nodes, and with the OpenAiInterface software installed; they target, on the one hand, the infrastructure side of a LTE network, and on the other hand radio-oriented functions, like base stations and UEs.
These pieces are described in more detail in this section of the tutorial
Extra requirements
Also the script that we describe in this tutorial requires a separate Python library named r2lab, that you need to install as follows:
pip3 install r2lab
Phone setup
Here's the generic setup regarding the commercial phones available
There currently are 2 phones available in the room named macphone1 and macphone2
| Phone # | Model |
|---|---|
| 1 | Nexus 5 |
| 2 | Nexus 5 |
In order to use them as UE's in your experiment, you can control them essentially through 2 ways.
ssh from faraday
As shown above, each phone is physically connected through USB to a MAC (also in the room) named macphone1 for the first phone, and of course macphone2 etc..
The controlling MAC's are exposed from faraday as hostnames like e.g.
macphone1You can reach ssh-enter them from faraday by typing e.g.
macphone1
This is a convenience alias, that actually refers to a private key required to login; this one is located in
/home/faraday/r2lab-embedded/mac-ssh-keys/macphoneFrom that point you can get a list of available commands, like always
help
Among other things, you'll want to check for the following commands
phone-status phone-off phone-on
So for example to get the status for phone #2, run this command on faraday:
r2lab-tutorial@faraday:~$ macphone2 phone-status && echo OK
phone is turned ON
OK
Or more simply if you just want to login into the MAC box, you can do this
r2lab-tutorial@faraday:~$ macphone2
Last login: Fri May 12 14:50:13 2017 from rhubarbe-switches
macphone2:~ tester$
From macphonen
Once on macphone2, just like on faraday, there are some convenience tools available in this shell environment
macphone2:~ tester$ help
#################### Native bash help
<snip>
#################### R2lab: tools for managing R2lab phone from macphone
refresh     retrieve latest git repo, and source it in this shell
phone-start-app
        start an app from its package name
phone-wifi-on   turn on wifi (tested on nexus 5)
phone-wifi-off  turn off wifi (tested on nexus 5)
phone-on        turn off airplane mode
phone-off       turn off airplane mode - does not touch wifi settings
phone-status    shows wheter airplane mode is on or off
phone-reboot    reboot phone with abd reboot
You can also of course use adb, and thus eventually enter the phone itself
macphone2:~ tester$ adb devices
List of devices attached
062337da0051af9f    device

macphone2:~ tester$ adb shell
shell@hammerhead:/ $
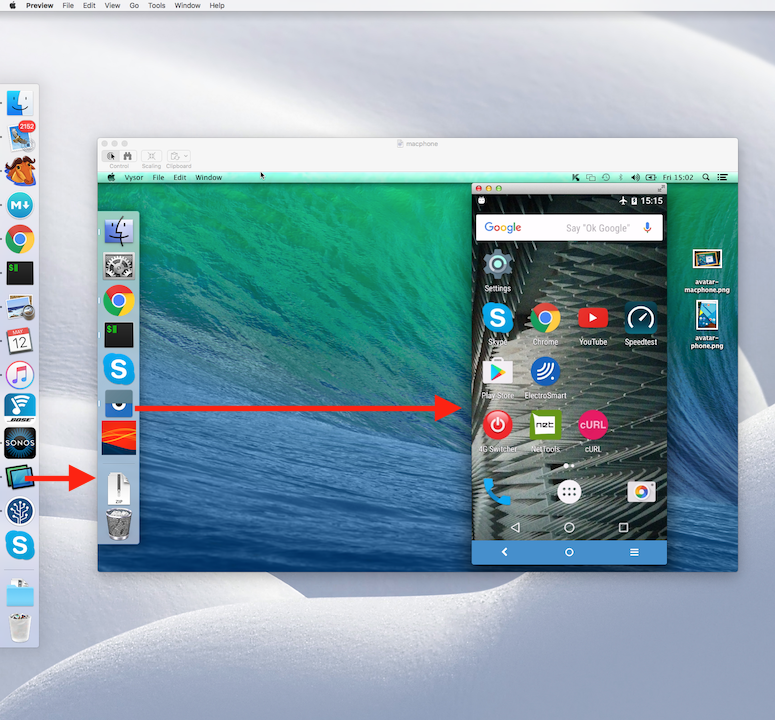
VNC access
Another way to control the phone is through VNC, or equivalently the Screen Sharing application if your own computer is a MAC. This way you can obtain a video session in macphone1, as illustrated below, and from that point you can run the Vysor application and see the phone screen, and interact with it as if it were in your hand.
For this you will need the following information (use proper phone number of course):
hostname : faraday-macphone1.inria.fr
port number : 5900
macphone's user id : tester
password : tester++
SIM cards and other details
- There is no reason why you would need this, but if only for the record:
- the Android phone's SIM card PIN is
1234 - the iphone's SIM card PIN is
0000; its IMEI is353315078943730
Images
The following images are available for uploading on R2lab:
oai-gwcomes with primarilyopenair-cn(from this git repo)oai-enbcomes with primarilyopenairinterface5g(from this git repo)
Please note that the latter one only makes sense on nodes that have a USRP attached. The former on the other hand can run on any node.
Typical setup
For more details on how to run a 5G network inside the room, please
take a look in the R2lab git repo at the OpenAirInterface
demo
and in particular the source code for
oai-scenario.py.
This script leverages these 2 images in order to create a setup where
- one (any) R2lab node is used to run a 5g HSS,
- one (any) R2lab node is used to run a 5g EPC and a 5g SPGW,
- one (USRP) node is used to run as a 5g Base Station,
- the commercial phone is used to connect to the 5G network;
Both images come with their own set of convenience shell functions,
and these are leveraged in oai-scenario.py in order to keep that
python script's size reasonable. Of course you do not have to use these convenience tools, you can use lower level tools to perform the configurations that you'd like.
For the sake of completeness, the convenience tools available on these 2 images are defined here:
nodes.shis what all regular nodes already have (source code)oai-common.shis relevant on both images (source code)oai-gw.shis exposed in theoai-gwimage (source code)oai-enb.shis exposed in theoai-enbimage (source code)
There is room for quite some improvement in these tools; if of interest, feel free to discuss this topic on the users mailing list.
The software and hardware featured at R2lab allow to setup an experimental 5G network inside the anechoic chamber.
As of now, the simplest option is to use a commercial phone to act as the tip of the iceberg in this setup.
It is in principle doable to run a UE inside a R2lab as well, but we have no working implementation of that as of yet.
Again, feel free to discuss this topic on the users mailing list.